In Search of the Perfect PC Game Chair – #5 (Wrapping Up)

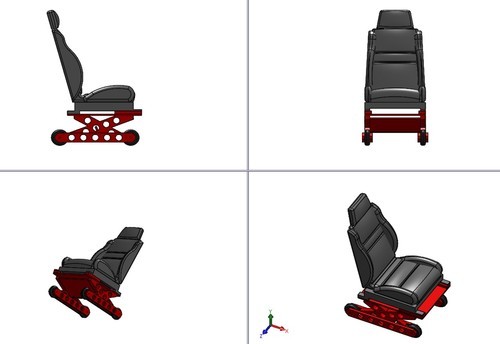
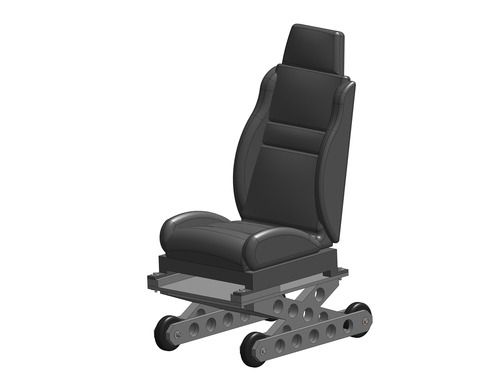
This is the final installment of my PC Seat build.  You can find the related posts here.  

After a week of using my new chair, a couple of things became apparent…

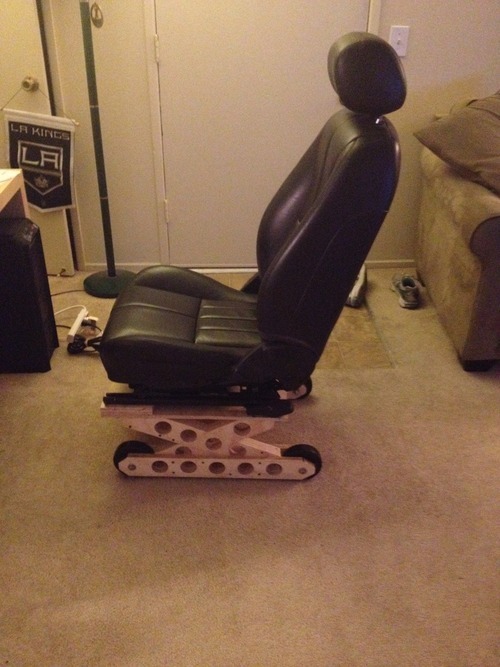
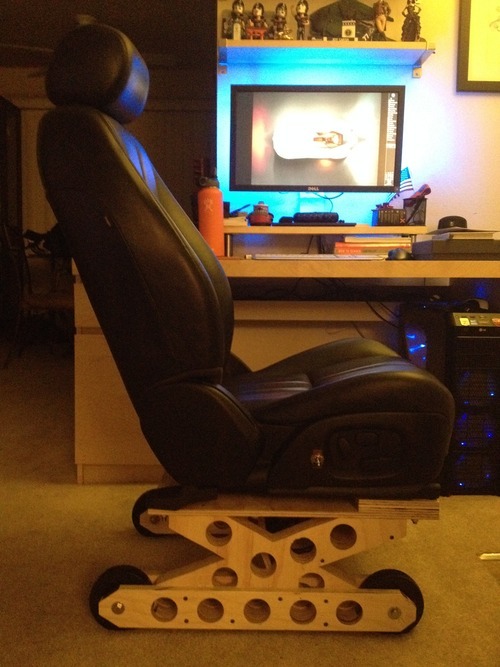
1)  It’s as comfortable, robust, and ergonomic as I had hoped (score!)

2)  Realizing that I have a love hate relationship with paint (sometimes it works, and sometimes it doesn’t) and that the chair doesn’t look half bad as is, I’m going to postpone making it colorful, indefinitely.

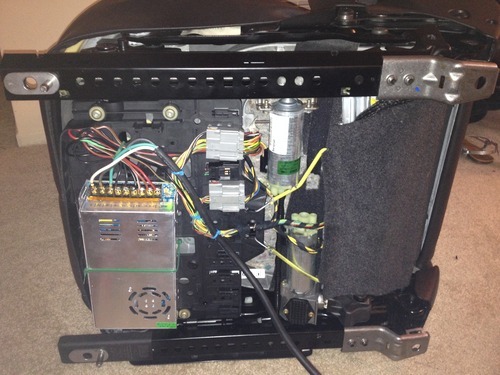
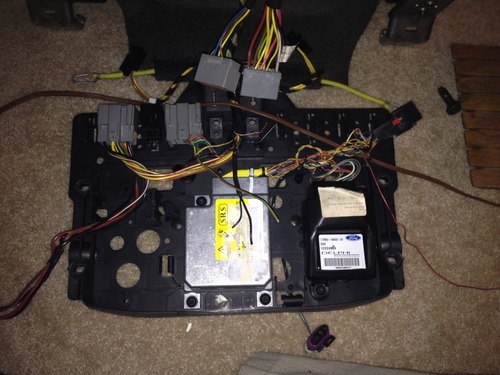
3) The power adjustments are awesome.  That said, the power supply I found has a small fan making it undesirable to leave powered at all times.  Plugging and unplugging the chair each time I want to make an adjustment is equally obnoctious.

So, I installed a swtich.  

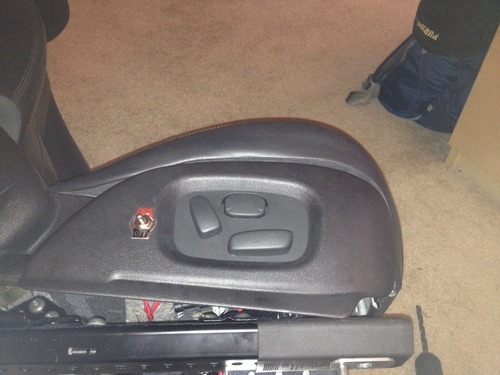
Now the chair can remain plugged in, and I turn the power off on a whim.

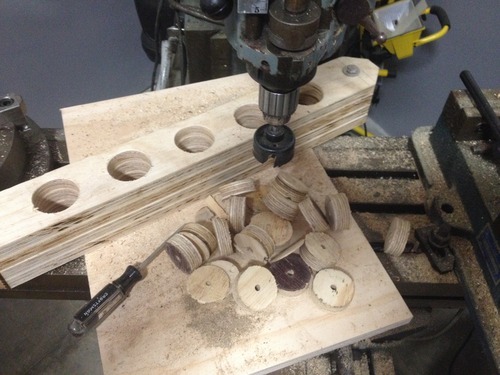
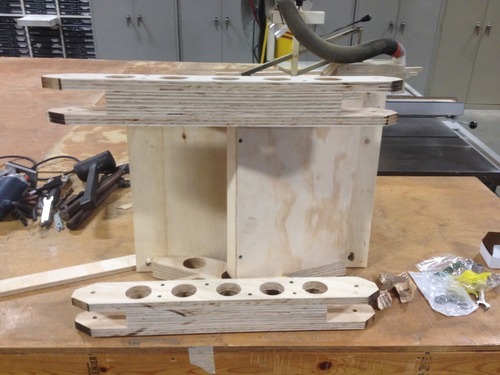
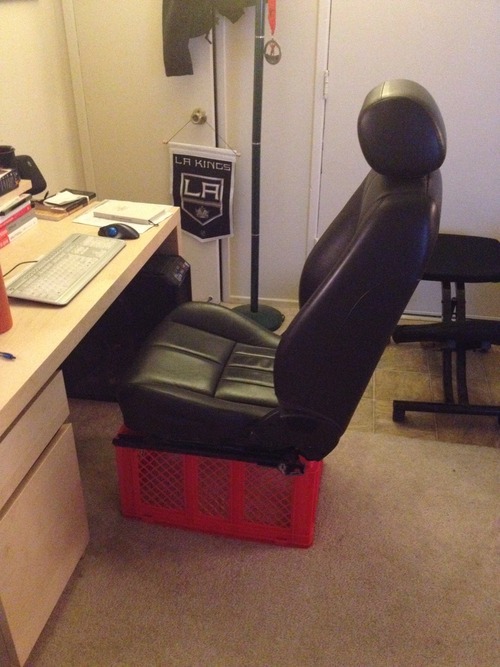
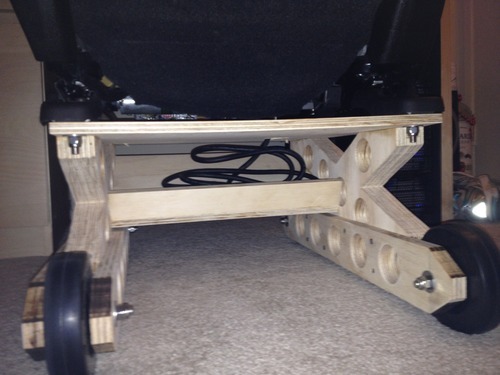
Lastly, I drilled a 2” whole in the upper plate of the base so the power chord routes nicely to the shelf below.

So, what did all this set me back?  Here’s the rundown:

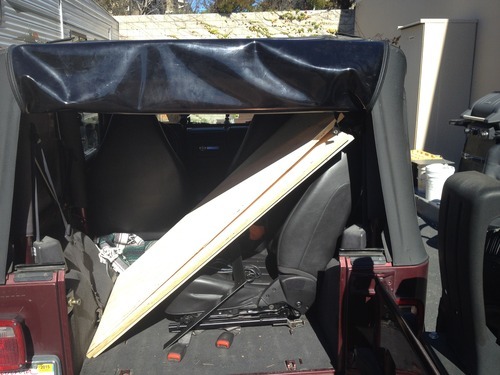
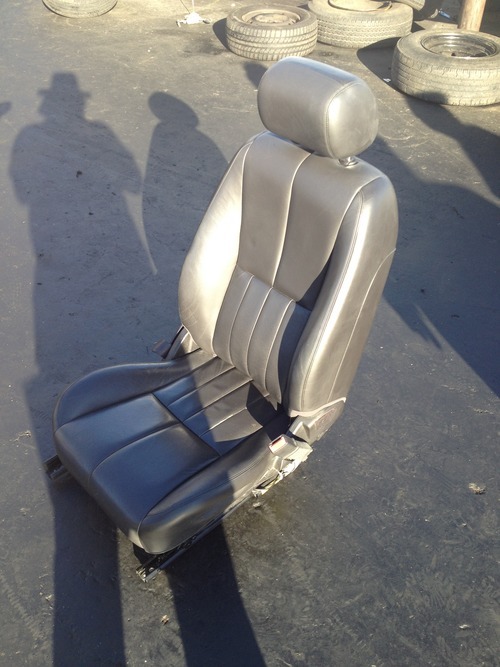
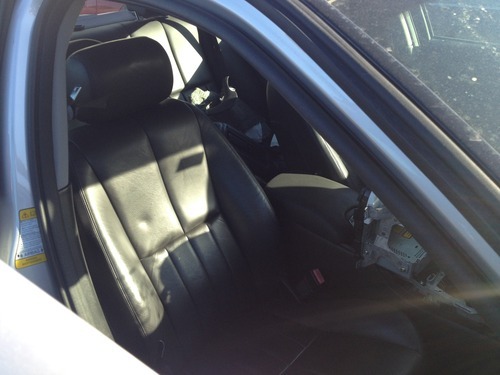
$100 – Jaguar S Type passenger seat (scrap yard)

$43 – Power supply and power chord (Amazon)

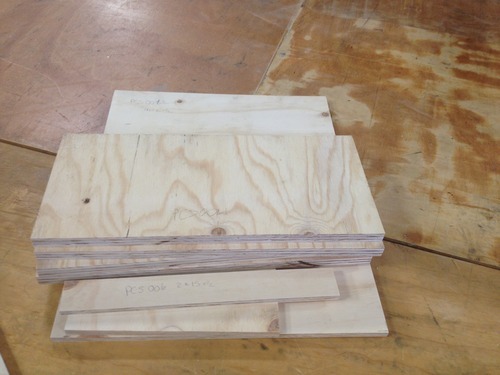
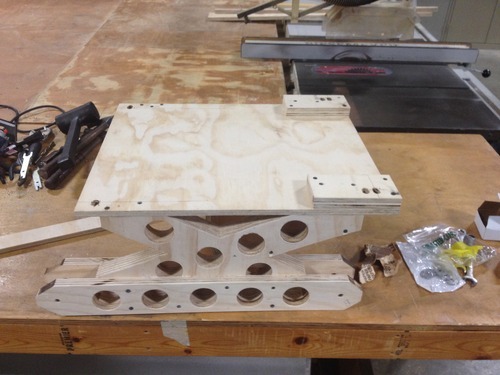
$42 – Plywood (Home Depot)

$60 – Wheels and Hardware (McMaster)

$5   – Power switch (Amazon)

———————————————————————————-

$250

Now, before you’re pocket book hangs it’s head in shame, keep in mind that I could have spent a little more time and probably saved ~$50 in materials. Also, a leather office chair at Office Max will cost between $180 and $400.  And as previously mentioned, I have yet to meet one that fit me, was comfortable, and lasted more than 6 months before the mechanics gave out. So all in, I still think I came out ahead.

That wraps up the build. Feel free to check out the pictures here.  Now… on to the games!

In Search of the Perfect PC Game Chair – #4 (All about the base)

image

This is installment four of my PC game chair build, started here.  Interested? Follow along here.

Step 4: Building the Base

Having set my design to drawings I collected my tools…

image

packed up my jeep…

image

and went to my friend’s shop to get building.

The first steps were to cut the ¾” and ½” plywood sheets to the part sizes needed.  Note that each “x” (side support) is made of 2 parts sandwiched together, so there are four plates for them, in addition to 4 wheel rails, a top plate, and two parts for the “bookshelf” underneath…

image

I started with the wheel rails, shaping them and drilling 3/8″ holes at the ends for the wheel shafts and 5 circular holes along the length.  the latter process was made easier by bolting the 4 rails together with the wheel axle bolts to make drilling them all together possible.  That said, drilling the holes became quite the endeavor as the  hole saw I had could only cut through one rail at a time and prying the plug out after each cut was quite painful.  But I soldiered through… (anyone need about 50 small wooden wheels?)

image

Next, I laid out the X shaped side members and stacked the plates for them in pairs. Similarly, this allowed me to cut all four to shape and drill their holes together.

image
image

With the sides complete, I attached the wheel rails and attached them to the base plate.  Note, up to this point I had only used drywall screws to join the pieces.  However, the leg to base joint was critical to the chairs stability and strength, so I used wood glue in addition to screws.

image

Similarly, I fit, glued, and screwed the “bookshelf” components in between the leg supports.

image

Finally, the upper standoffs were added and holes drilled to accommodate the bolt locations and pins that extend from the base of the chair’s rails.  Note that these holes were not in the drawings as I had not yet measured their placement.  This ended up being a bit of a mistake as I was quite tired at this point and missed a measurement by ~ ¼”.  Hence, if you look closely, you’ll see that I had to use a router to turn the holes into slots.  Fortunately, these errors would be hidden under the chair and not visible upon completion.

image

I had intended to paint the base at this point, but as mentioned previously, was beginning to make mistakes.  Instead, I packed everything home and had a pleasant dinner with my wife and father in law.  Later that night, I made the first full up assembly of the chair and.. voila!

image

Everything fits as planned, all the motors work, and its really comfortable! (for me at least,  if you’re not 6’1″ you might want to knock an inch or so off the base’s height)  Both my wife and a friend I sent a picture to suggested that the wood looks great next to my desk, and I have to agree.  That said, the exposed screws, pencil marks from construction, and couple of burn marks from the dull band saw blade are a turn off for me, so I still plan to paint it.  But its raining (in LA?! Crazy, I know!) and it will have to wait for another opportunity.

image

To be continued… (#PCSeat)

Original photos by Dana P. Howard (www.highlandwolf.com)

In Search of the Perfect PC Game Chair #3 – (Power and Plans)

image

This is installment three of my PC game chair build, started here.  Interested? Follow along here.

Step 3: Power and Plans

Having made my seat of choice less explosive and sorted out it’s power needs, I set about installing the power supply and planning the base design.   As discussed in the previous post, I had ordered a 360 watt power supply and AC power cord from Amazon.  Installing the power supply was straight forward.  It’s three 12V output lines matched well with the 3 power input lines of the seat (2 gross motion lines and 1 line for the lumbar support) and with a little trimming, fitting, and a few zip ties, it fit nicely in the plastic tray at the base of the chair.

image

I’d post a video of the chair working, but given its slow motion, all you would get is a whirring sound in the background and a video of me with a satisfied grin on my face 😉

Knowing that the chair now worked, I set about figuring out dimensions for the base.  As shown in the picture above, a milk crate made a suitable first test, though at 12.5 inches tall it proved to be at least 1.5 inches too tall for me to comfortably place my heals on the ground. With the chair able to go up about another two inches, I settled on a floor to chair height of closer to 10 inches.

From there it was figuring out what kind of shape looked good that I could build relatively easily with some power tools (borrowed from a good friend) and simple lumber. I downloaded a seat model, picked out some 5″ rubber wheels, and settled on the shape below.

image

The color and hole pattern are still TBD, but you get the drift.

image

The wheels and hardware are on the way (McMaster, the Amazon of industrial stuff)  Next step is to make some drawings, get the plywood, wood screws, and paint, and get building!

To be continued… (#PCSeat)

Original photos by Dana P. Howard (www.highlandwolf.com)

In Search of the Perfect PC Game Chair – #2 (Playing with Explosives)

image

This is installment two of my PC game chair build, started here.  Interested? Follow along here.

Step 2: Playing with Explosives

Having gotten my prize home and found it free of freeloading mice etc., I set about making it safe to use as a piece of home furniture.

Choosing a seat from a high end luxury car presents as many challenges as it does benefits.  According to the electrical diagram (and assuming they are still functional), my lovely seat has 8-way adjust-ability (including lumbar support! oooooh, ahhhhh), seat heating, and a passenger restraint and seat mounted airbag!  While the adjustment features would be way cool to maintain, the heat and the two small explosive devices (seat belt and airbag systems) had to go.  Nothing like fire and an actual explosion going off during a video game!  So, I turned the chair over, got out the tools, pulled up the schematic and started digging.

image
image

Disassembling the wiring harness (that harness tape is a sticky mess!) and following the diagram, I quickly identified that I could keep the adjustment buttons and functions while ditching the heater control, seat weight sensor, and a myriad of other junk.  Removing the seat belt safety restraint (explosive #1 and the belt on the far side) was a simple matter of unbolting the components, while getting the air bag out (explosive #2) was a little more involved.  I located it’s lead wire, snipping it at the base of the seat, for safety.  Then, I gently (crowbar) pulled the back panel of the seat off, removed some of the upholstery clips, and removed the airbag from the right side of the seat.

image
image
image
image

After putting the remaining seat back together, I went back to the schematic and looked up the fuses for each of the remaining seat systems.  Determining that the seat motors run off of 12V (duh) and pull a maximum of 30A (yowza!) I went to trusty Amazon to find a 360W power supply and a suitable AC chord (Prime membership can be dangerous!  and useful ;-)).

So, after much activity, I have an explosive free seat and a power supply en route to get it running.  Will it work?  Will the magic smoke escape? Can I design a base for it that doesn’t look like the cubist exhibit at the LA County Museum of Art?  Stay tuned…

To be continued… (#PCSeat)

Original photos by Dana P. Howard (www.highlandwolf.com)

In Search of the Perfect PC Game Chair – #1 (Taking a seat)

image

As many coworkers of companies past can attest too, I’m something of an ergonomiphile (and yes, I’m making that up).  I’ve probably tried 12 different office chairs and 5 times as many computer / office arrangements in as many years, playing with chairs, input devices, monitor arrangements, lighting, and a multitude of other things.  One thing in particular I have never been satisfied with is in finding the perfect seated PC chair.

In full disclosure,I have owned more than a few commercial chairs, and in recent years (for work, anyway) resorted to standing desks and the occasional kneeling chair for my PC needs.  But when I come home from a day of work and just want to relax and play some PC games, the average chair just wont do.  I’ve tried $150+ office chairs, kneeling chairs, plugging my PC into the TV and playing from the couch, and just cant seem to get it “right”.  So, faced with this frustration and in need of a new chair for the new apartment (came with the new wife 😉 ), I’ve decided something custom was called for.  And the PC-Car seat quest was born.

Step 1: Take a Seat

This is not a new idea, many have mounted car seats to PC chair bases , and even more have built race car and flight sim seats using similar techniques.  However, the later does not suit my purposes (purpose built, not good for every day use) and the former has one key problem – it uses the same base (casters, frame, and piston support) that most often fails when I use an office chair. So, time for something a little different…

The first step was getting a seat.  After a little research, I opted to visit my local pick-your-part yard and go hunting.  $6 got us in the door ($3 each, the wife came along for moral support and aesthetic approval 😉 ) with a bag of tools slung over my shoulder and we started walking among their rather extensive selection. After some rooting and seeing a wide array of candidate seats, a number of important criteria emerged:

  1. Leather is better (easier to clean and better looking to boot!)
  2. interface between the seat and the car floor needs to be as flat as possible (note, many seats have attachment points that are perpendicular to the plane of the floor.  This would make mounting anything to the seat difficult later)
  3. Passenger seats are probably better (A – they tend to be in slightly better condition and B – their inner workings have likely been used less, making them more reliable).

After much searching and wrinkled noses (don’t ask), we stumbled upon this lovingly restored (cough) 2003 Jaguar S Type…

image

.. and it’s intact, incredibly comfy,  leather seats!

image

Getting the seat out of said Jaguar was something of a challenge.  The seat was in the aft position on its rails making getting at and releasing the back two bolts a challenge.  But a little blood, sweat, and a borrowed 15mm box end wrench later (thanks loaner guy! whoever you were…) we had it out and headed for the cashier.

image

Now, LKQ’s pricing guidelines were anything but clear (I even called ahead and was told to expect a $40 hit), so when the greasy fellow behind the counter flatly asked “is it electric?” (yes), and said “$100”, I was a little set back.  But I was too deep in car blood to walk away now, so I quietly paid the man and hauled my prize to the back of my jeep and took it home happy knowing I had some electrical work, frame design, and much PC gaming bliss ahead of me.

To be continued… (#PCSeat)

Cover photo borrowed from humorsharing.com

All other photos by Dana P. Howard (www.highlandwolf.com)